

A completed installer is the first checkpoint. The second is being able to open GGSCI and inspect the Manager process. Work through both before moving on to a replication configuration.
This guide covers GoldenGate Classic Architecture 19.1.0.0.4 for Oracle Database on Linux x86-64. The screenshots show that historical release; use the matching installation media and check Oracle’s platform certification for your environment. Microservices deployments follow a different setup.
Plan the installation
Keep the extracted installation media separate from the software home. The example below uses these locations:
| Purpose | Example value |
|---|---|
| Installation media | /u01/Goldengate |
| GoldenGate home | /u01/app/oracle/product/gghome |
| Oracle Database home | /u01/app/oracle/product/19.0.0/dbhome_1 |
| Manager TCP port | 7809 |
The database path identifies an existing installation. The GoldenGate path is a separate destination. Oracle records the GoldenGate home in its central inventory. For a fresh installation, choose an empty destination without spaces. See Oracle’s Classic installation overview.
Check the host before opening the wizard
Use the operating-system account that will own the installation. It needs access to the software home and its working files; the example uses oracle. Check Oracle’s operating-system privilege requirements before assigning ownership.
Confirm your database home and instance name. For this example, replace YOUR_DATABASE_SID with the actual SID:
export ORACLE_HOME=/u01/app/oracle/product/19.0.0/dbhome_1
export ORACLE_SID=YOUR_DATABASE_SID

id
test -d "$ORACLE_HOME" && echo "Database home exists"
command -v unzip
df -h /u01 /tmp
free -m
These are inspection commands, not proof that every prerequisite has passed. Compare available resources with the selected build’s requirements. The 19.1 installation guide explains database environment settings; the operating-system requirements cover host resources.
The graphical wizard also needs a working display session. If you use SSH with X11 forwarding, confirm that the connection and display authorization work before launching it.
Extract the media and launch OUI
After obtaining the matching archive from Oracle, place it in the media directory. Run the following as the installation owner, adjusting the paths if necessary:
cd /u01/Goldengate
unzip 191004_fbo_ggs_Linux_x64_shiphome.zip

mkdir -p /u01/app/oracle/product/gghome
ls -ld /u01/app/oracle/product/gghome

cd /u01/Goldengate/fbo_ggs_Linux_x64_shiphome/Disk1
./runInstaller
The directory under Disk1 contains the installer. A permission error on the destination should be resolved by its owner or administrator before continuing. Oracle documents the Linux entry point in its interactive installation instructions.
Work through the installer
Choose the database build
For the illustrated Oracle Database 19c environment, select the corresponding database option. This selection concerns the database that GoldenGate will work with.
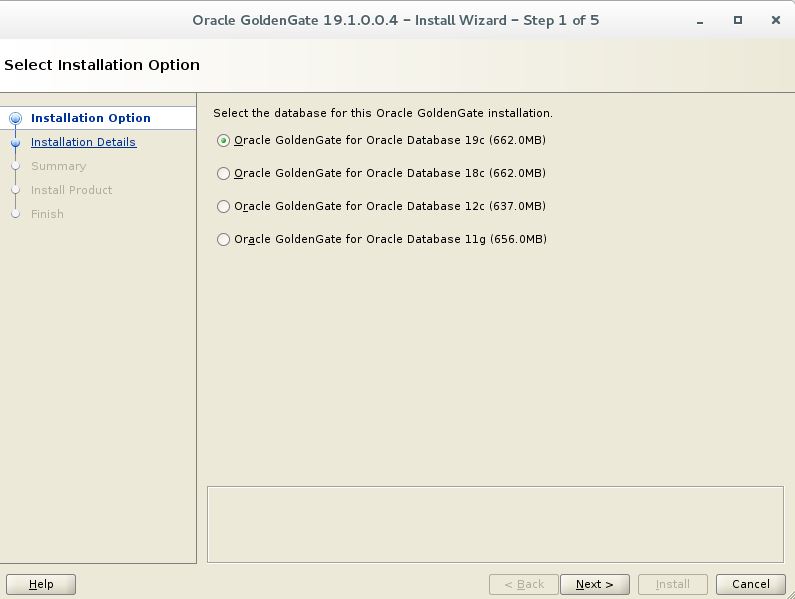
Enter the installation details
Use the planned GoldenGate directory for Software Location. When Start Manager is selected, provide the existing database home and an available Manager port. The illustrated values match the plan above.
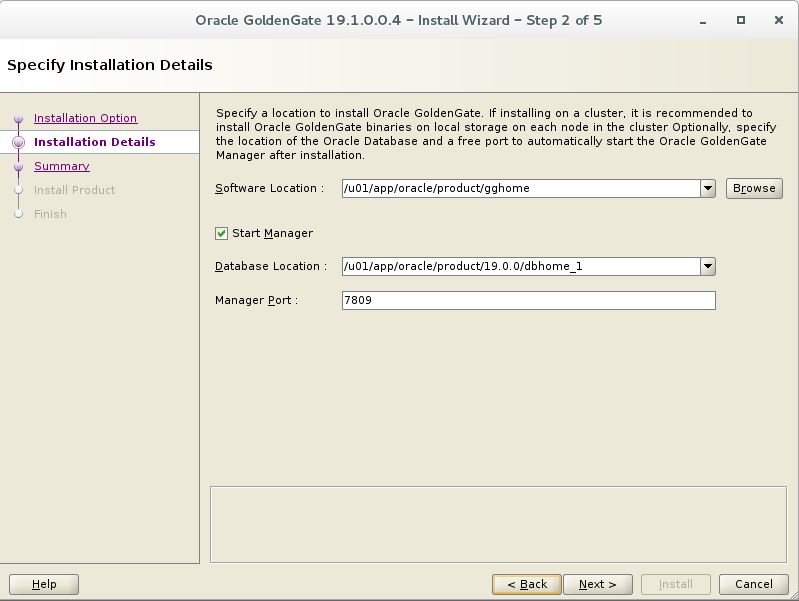
Each Manager instance needs its own port. 7809 is the usual starting choice; another instance may already be using it. See Oracle’s Manager port guidance.
Review before installing
Check the selected build, destination, database home, and port on the summary screen. Correct a mismatch before beginning the installation.
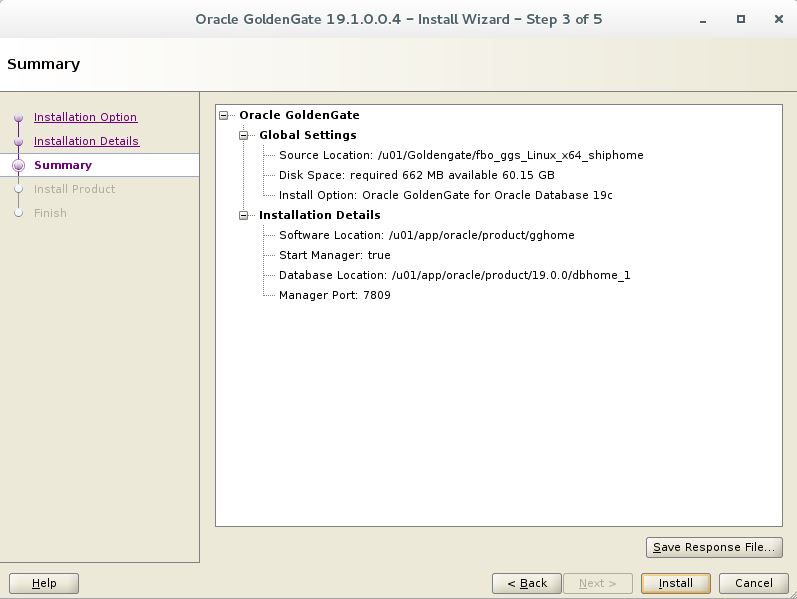
Follow the progress
Let the installer complete its checks and installation tasks. If a task fails, inspect its reported error before retrying.
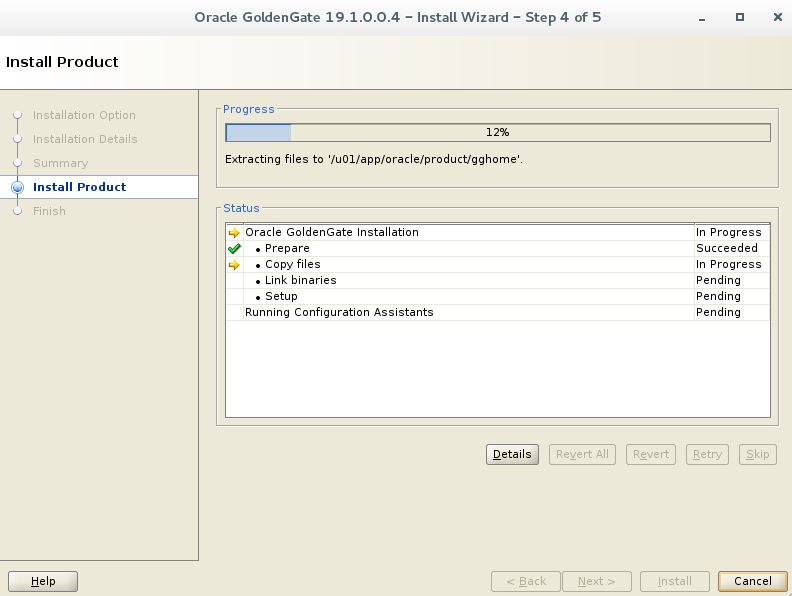
Confirm completion
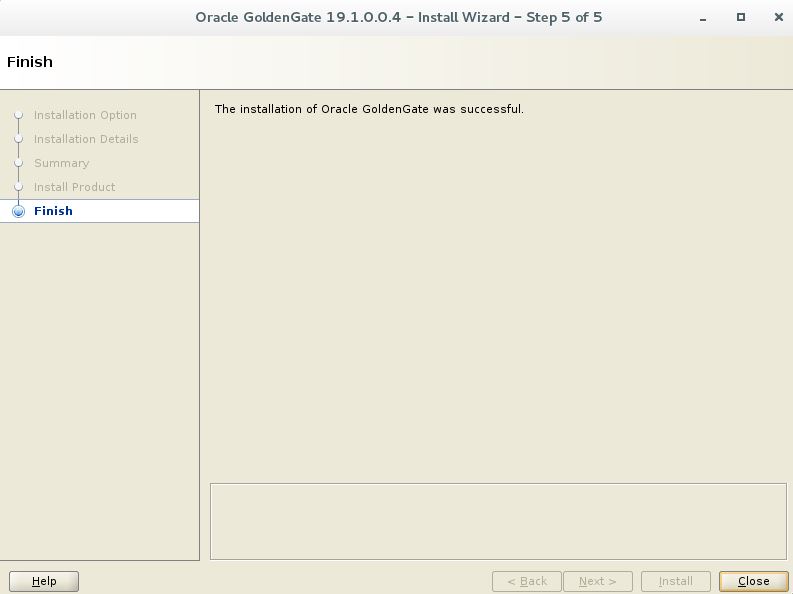
Close the wizard after it reports a successful installation. If this is the host’s first OUI installation, an inventory setup prompt may also require an administrator to run the displayed root script. See Oracle’s OUI procedure.
Verify from the GoldenGate home
Return to the terminal and start the command interface:
cd /u01/app/oracle/product/gghome
./ggsci
At the GGSCI prompt, run:
INFO MANAGER
EXIT
INFO MANAGER reports whether Manager is running. For a running process, it also identifies the process and port. Check the actual result rather than relying on the installer’s success screen. See the INFO MANAGER reference.
If Manager was not started during installation
Open GGSCI again. Create the working directories if they have not been created, then edit the Manager configuration:
CREATE SUBDIRS
EDIT PARAMS MGR
In the parameter editor, save this line with your chosen port:
PORT 7809Return to GGSCI:
START MANAGER
INFO MANAGER
EXIT
These are separate steps: EDIT PARAMS opens an editor; the PORT line belongs in that file. Oracle documents working-directory creation and the Manager parameter file.
Investigate a failed verification
| Symptom | First check |
|---|---|
| The wizard cannot open | Display forwarding and authorization for the installation account. |
| The destination is rejected | Directory ownership, available space, and whether it already contains an installation. |
| GGSCI reports a missing library | The library named in the error and the environment for this GoldenGate build. |
| Manager will not start | Its configured port and the GoldenGate event log. |
For startup diagnostics, run this inside GGSCI:
VIEW GGSEVTIt displays ggserr.log, which records GoldenGate events and errors. The VIEW GGSEVT reference describes the command.
At this point the software installation and Manager checks are complete. Database preparation, credentials, Extract, trails, and Replicat configuration are separate tasks; a running Manager alone does not establish replication.